
Outlook Configuration
To configure Email Module, open WordPress Admin Dashboard, and navigate to Support > Configuration > Email.
Select Outlook from the list of providers and click Set Provider.
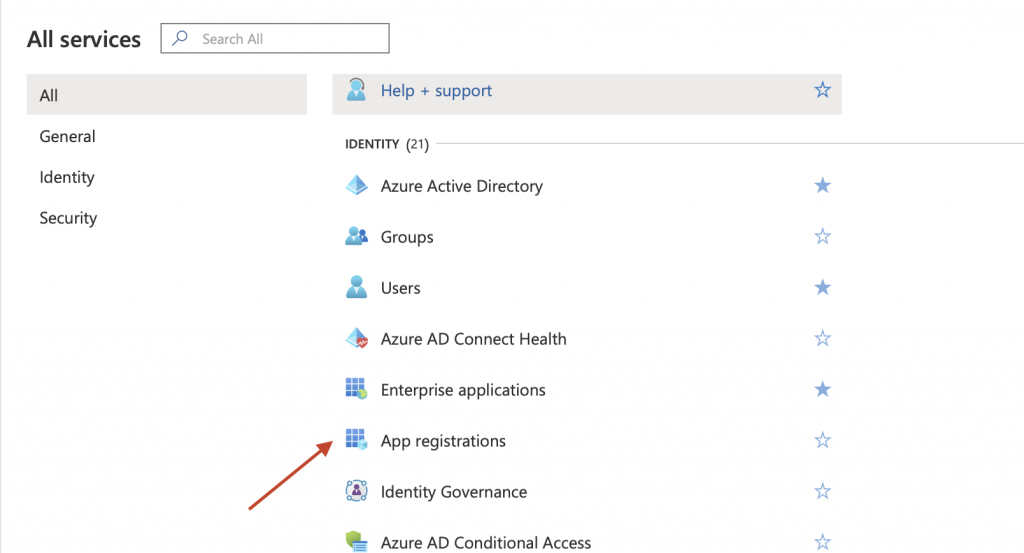
In the new browser tab, navigate to Azure and sign in to your Microsoft account. Once the Azure Portal is open, click on All services in the left sidebar and choose App registrations.
Click Register an application button.
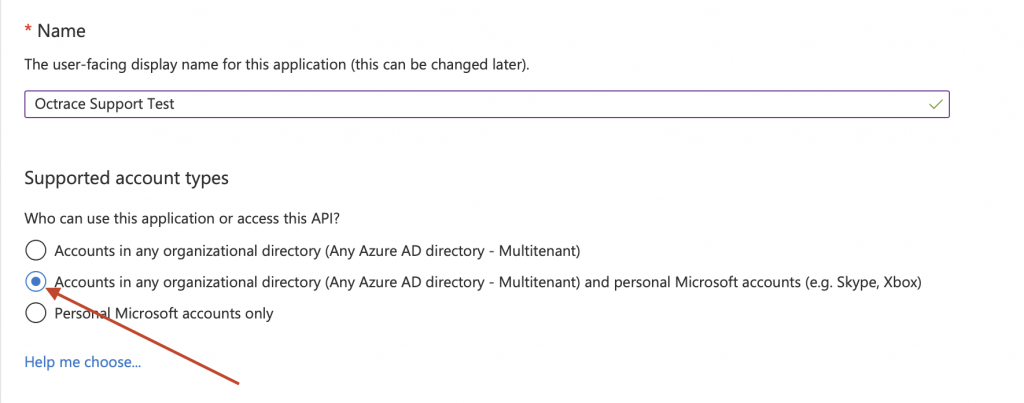
Enter the application name you want and choose Accounts in any organizational directory (Any Azure AD directory – Multitenant) and personal Microsoft accounts (e.g. Skype, Xbox) option, then click Register.
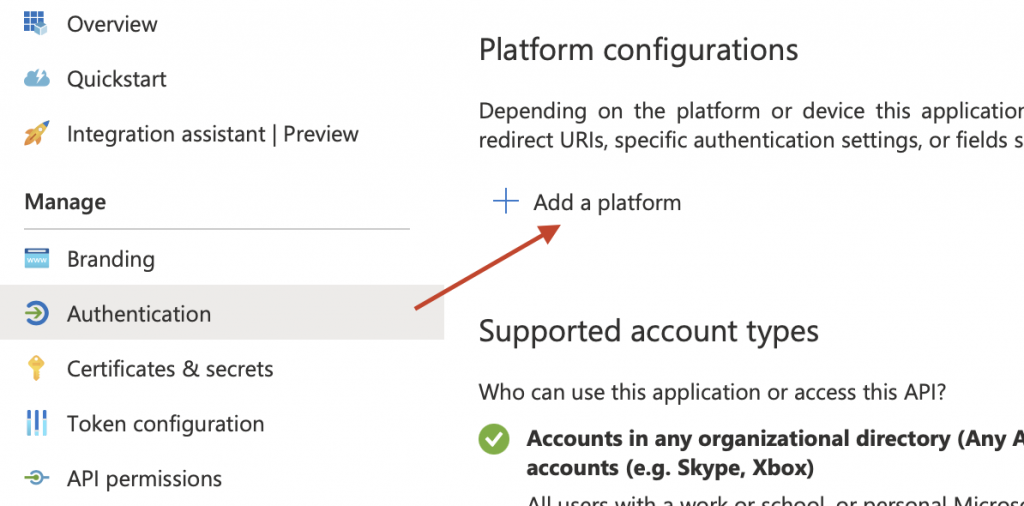
Open Authentication tab in the sidebar and press Add a platform > Web.
Now we need to fill the Redirect URIs field. To get the URI for your site, go back to the tab or window with your WordPress site. Look at the bottom of Outlook Settings for the link Copy Redirect URI and click on it to copy.
Now return to the Azure page and paste it into the field under Redirect URIs. Press Configure.
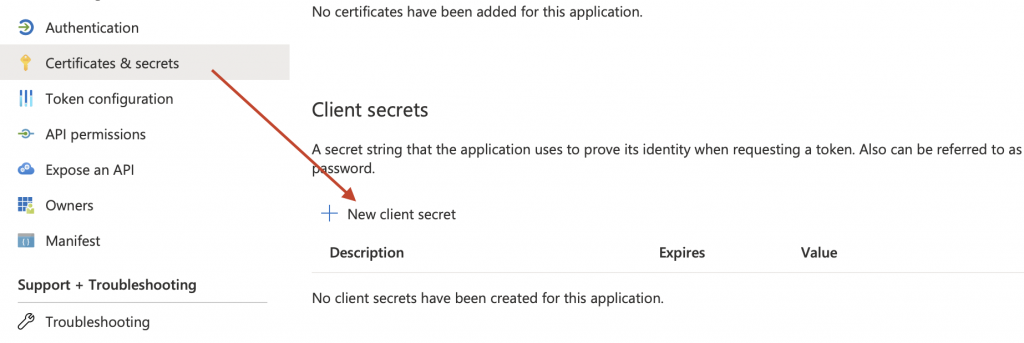
Click on All services in the left sidebar and copy your Application (client) ID, paste it into the Application (client) ID field at the Email Configuration page. Go back to Azure and Click on Certificates & secrets in the left sidebar. Press New client secret Button.
Choose the description you want and set expiration to Never.
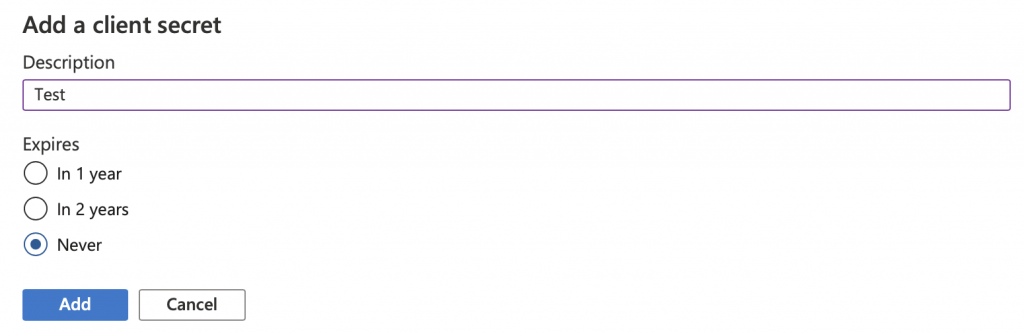
Copy your new client secret and paste it into the Client Secret field on the Email Configuration page. Lastly, fill the Email Address field with your outlook address and click Submit.
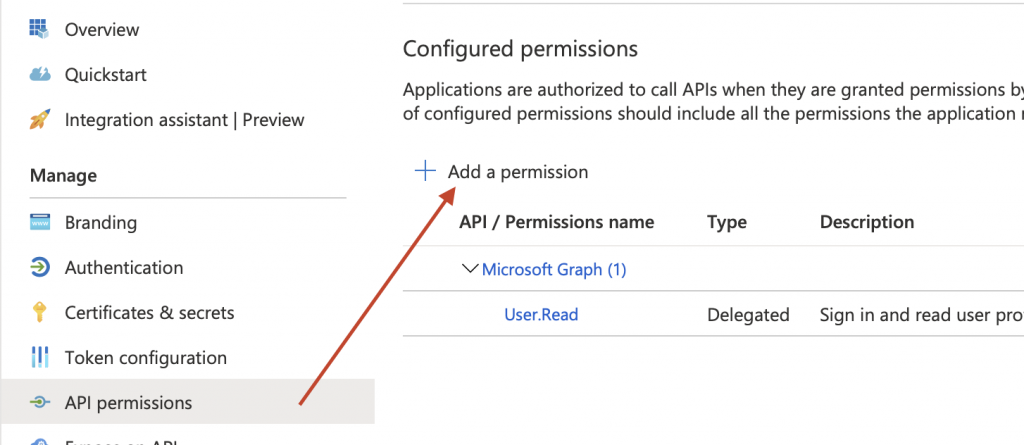
Go back to the Azure and Click on API permissions in the left sidebar. Press Add a permission button.
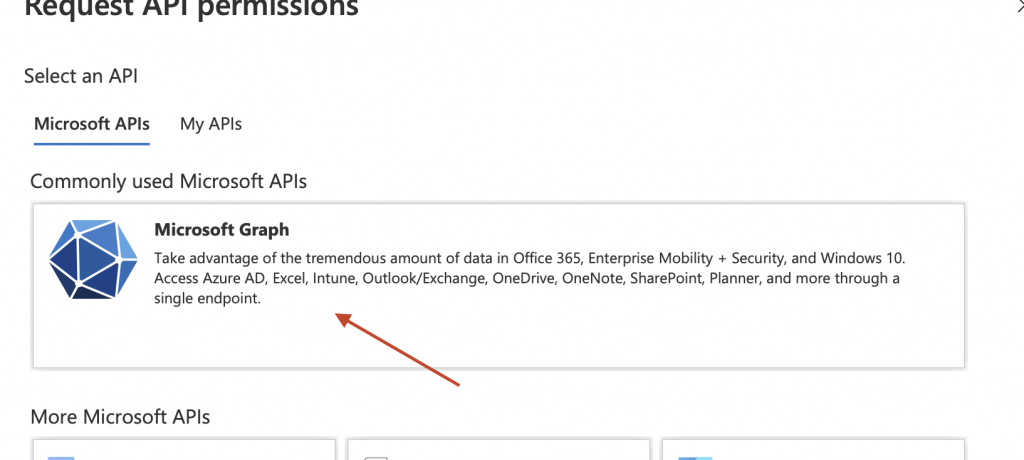
Click on Microsoft Graph block and choose Delegated permissions.
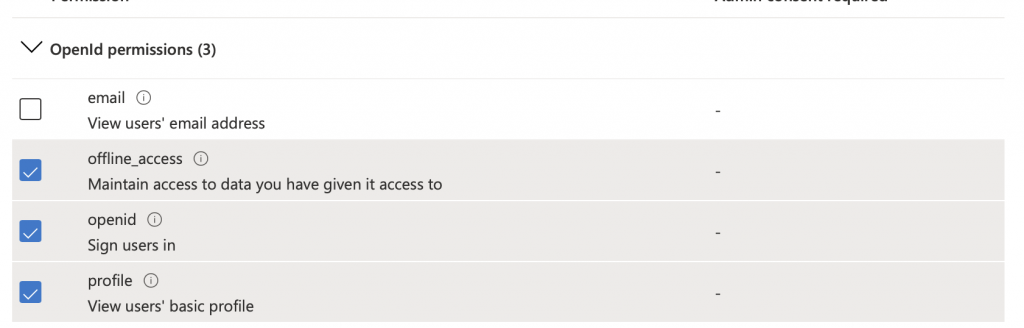
Check the following boxes:
- offline_access
- openid
- profile
- offline_access
- openid
- profile
Now scroll down to the Email section and check these boxes:
- Mai.Read
- Mail.ReadWrite
- Mail.Write
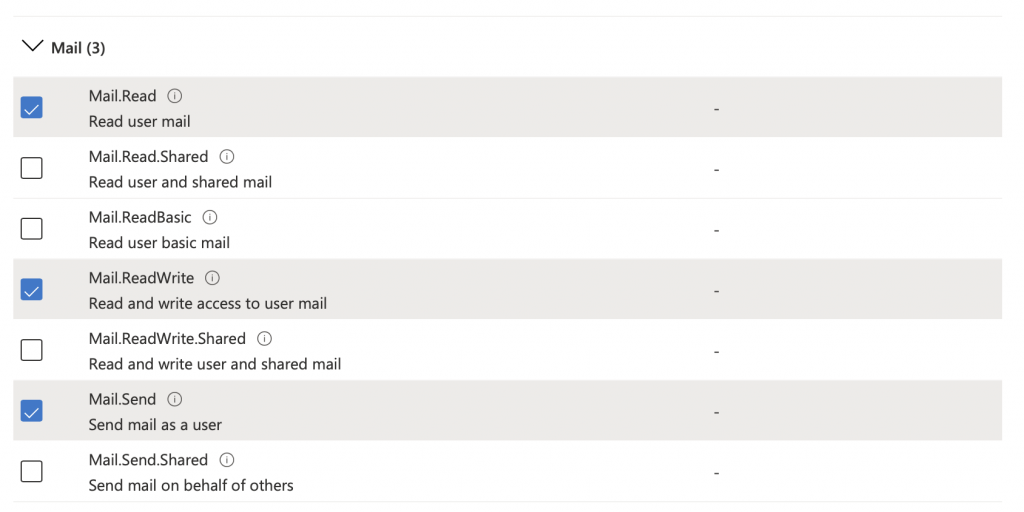
- Mai.Read
- Mail.ReadWrite
- Mail.Write
Click Add permissions button.
Now go back to your WordPress website and at the end of Email Configuration Page, click Authorise and allow your website to send and receive emails.
After that, you will be redirected to the Email Configuration page. To test Email Module click Send Email button at the very bottom of the page. Then you will receive a message to the email address of your current WordPress profile.